

How to install a hydraulic valve?
Oct 23, 2025
Installing a hydraulic valve is a crucial task that requires precision and a good understanding of hydraulic systems. As a hydraulic valve supplier, I've seen firsthand the importance of proper installation to ensure the efficient and safe operation of hydraulic equipment. In this blog, I'll guide you through the step - by - step process of installing a hydraulic valve, covering everything from preparation to testing.
1. Preparation
Before you start the installation process, it's essential to gather all the necessary tools and materials. You'll need basic hand tools such as wrenches, screwdrivers, and pliers. Additionally, make sure you have a clean work area to prevent any contaminants from entering the hydraulic system.
Inspect the hydraulic valve thoroughly for any damage or defects. Check the valve's specifications to ensure it matches the requirements of your hydraulic system. This includes the flow rate, pressure rating, and valve type. For example, if you're dealing with a high - pressure system, you need a valve that can handle the pressure.
It's also a good idea to review the installation manual provided by the valve manufacturer. The manual will contain detailed instructions specific to your valve model.
2. System Isolation
The next step is to isolate the hydraulic system. This means shutting off the power supply to the hydraulic pump and relieving the pressure in the system. You can do this by opening the pressure - relief valve or using a pressure - gauge to monitor the pressure and ensure it's at a safe level.
Disconnect the hydraulic lines from the existing valve or the ports where the new valve will be installed. Make sure to label the lines correctly to ensure they are reconnected in the right place later. This will prevent any cross - connections that could lead to system malfunctions.
3. Mounting the Valve
Once the system is isolated, it's time to mount the hydraulic valve. Choose a suitable location for the valve that provides easy access for maintenance and inspection. The valve should be mounted in a clean and dry area, away from excessive heat or vibration.
Use the appropriate mounting hardware, such as bolts and gaskets, to secure the valve to the mounting surface. Make sure the valve is level and properly aligned to prevent any stress on the valve body or the hydraulic lines. Tighten the bolts evenly to ensure a proper seal.
4. Connecting the Hydraulic Lines
After mounting the valve, it's time to connect the hydraulic lines. Start by cleaning the ends of the lines to remove any dirt or debris. Apply a thin layer of hydraulic fluid to the O - rings or gaskets to ensure a good seal.
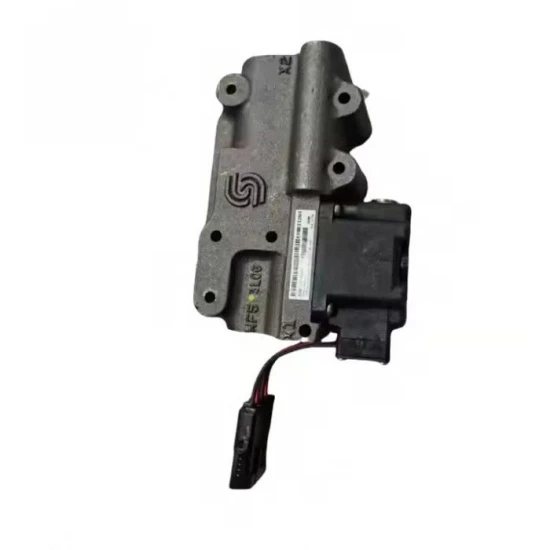

Connect the lines to the appropriate ports on the valve. Refer to the valve's diagram or the installation manual to ensure the correct connections. Use the appropriate wrenches to tighten the fittings, but be careful not to over - tighten them, as this can damage the fittings or the valve.
5. Electrical Connections (if applicable)
If your hydraulic valve is an electrically - operated valve, such as a Solenoid Directional Valve 34BM - H10B - T, you need to make the electrical connections. First, ensure that the power supply is disconnected before making any electrical connections.
Follow the wiring diagram provided by the valve manufacturer to connect the wires to the correct terminals on the valve. Use appropriate electrical connectors and secure the wires to prevent any loose connections. Once the connections are made, double - check them to ensure they are correct.
6. System Flushing
Before starting the hydraulic system, it's important to flush the system to remove any contaminants that may have entered during the installation process. You can do this by filling the system with clean hydraulic fluid and running the pump at a low speed for a short period.
Open the drain valves at the lowest points in the system to allow the fluid to drain out. Repeat this process several times until the fluid coming out is clean. This will help prevent damage to the valve and other components in the hydraulic system.
7. Testing the Valve
After flushing the system, it's time to test the valve. Start the hydraulic pump and gradually increase the pressure in the system. Monitor the valve's operation using pressure gauges and flow meters. Check for any leaks around the valve and the hydraulic connections.
Operate the valve through its full range of motion to ensure it's functioning correctly. If the valve is a directional valve, check that the fluid flow is changing direction as expected. If it's a pressure - reducing valve, such as the Pressure Reducing Valve Z3DR6VP2 - 1X/200, check that the pressure is being reduced to the desired level.
8. Final Checks
Once the valve is tested and functioning correctly, perform a final check of the entire hydraulic system. Inspect all the connections, bolts, and electrical wires to ensure they are secure. Check the fluid level in the reservoir and top it up if necessary.
Monitor the system for a period of time to ensure there are no issues. Look for any signs of abnormal noise, vibration, or temperature changes. If you notice any problems, shut down the system immediately and troubleshoot the issue.
Conclusion
Installing a hydraulic valve is a complex process that requires careful attention to detail. By following these steps, you can ensure a successful installation and the proper functioning of your hydraulic system.
If you're in the market for high - quality hydraulic valves, we have a wide range of products to meet your needs. For example, our Paving Machine Accessories KVME11201 Servo Valve is a great choice for paving machine applications.
If you have any questions about hydraulic valve installation or if you're interested in purchasing our products, we're here to help. Contact us for more information and to start a procurement negotiation.
References
- Hydraulic System Installation and Maintenance Manuals from Various Manufacturers
- Industry Standards for Hydraulic Valve Installation