

How to connect a Rexroth motor to a control system?
Jul 02, 2025
Connecting a Rexroth motor to a control system is a crucial process that requires careful planning and execution. As a supplier of Rexroth motors, I have extensive experience in this area and am here to guide you through the steps to ensure a successful connection. In this blog post, I will walk you through the process, from understanding the basics to troubleshooting common issues.
Understanding the Basics of Rexroth Motors and Control Systems
Before diving into the connection process, it's essential to have a basic understanding of Rexroth motors and control systems. Rexroth is a well - known brand in the field of hydraulic and electric motors, offering a wide range of products with high performance and reliability.
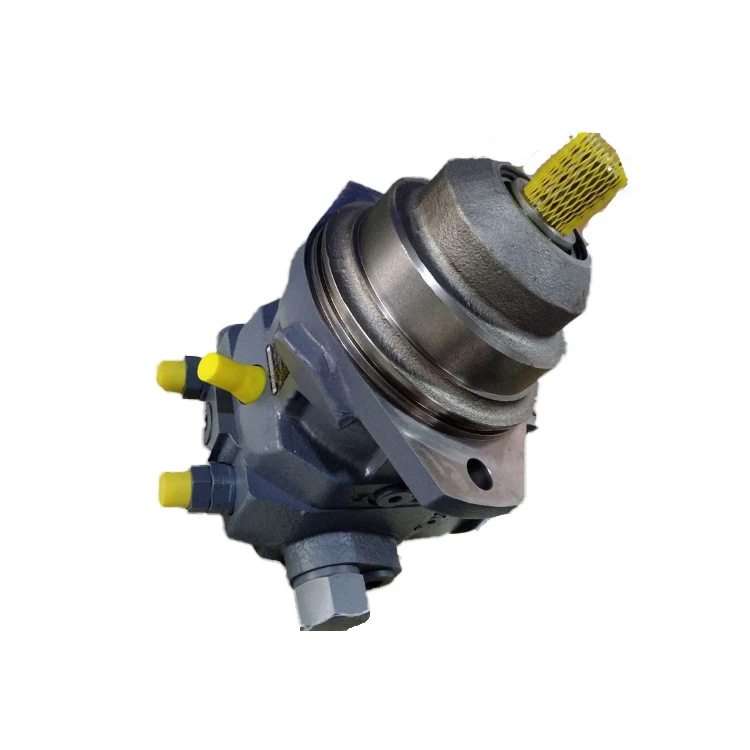
Rexroth motors come in various types, such as the A6VE High Pressure Piston Motor, A2FE10 A2FE16J Motor Displacement High Flow, and A2FE Piston Motor. Each type has its own characteristics and requirements for connection to a control system.
Control systems, on the other hand, are designed to regulate the operation of the motor, including speed, torque, and direction. They can be hydraulic, electric, or a combination of both. The choice of control system depends on the specific application and the requirements of the motor.
Pre - connection Preparations
1. Read the Manuals
The first step is to thoroughly read the user manuals of both the Rexroth motor and the control system. These manuals contain important information about the technical specifications, wiring diagrams, and connection procedures. Make sure you understand all the instructions before proceeding.
2. Gather the Necessary Tools and Materials
You will need tools such as wrenches, screwdrivers, wire strippers, and electrical tape. Additionally, gather the appropriate cables, connectors, and hydraulic hoses as specified in the manuals.
3. Inspect the Motor and Control System
Before making any connections, inspect the motor and control system for any visible damage or defects. Check the electrical terminals, hydraulic ports, and mechanical components to ensure they are in good condition.
Electrical Connection (if applicable)
1. Identify the Electrical Terminals
On the Rexroth motor, locate the electrical terminals for power input, control signals, and grounding. Refer to the wiring diagram in the manual to determine the correct terminal assignments.
2. Connect the Power Supply
Connect the motor to the appropriate power source according to the voltage and current requirements specified in the manual. Use the correct gauge of wires and ensure all connections are tight and secure.
3. Connect the Control Signals
If the control system uses electrical signals to regulate the motor's operation, connect the control wires from the control system to the corresponding terminals on the motor. Pay attention to the signal types (e.g., analog or digital) and the correct polarity.

4. Grounding
Proper grounding is essential for the safety and reliable operation of the motor. Connect the grounding wire from the motor to the grounding terminal of the control system or the electrical panel.
Hydraulic Connection (if applicable)
1. Identify the Hydraulic Ports
On the Rexroth motor, find the hydraulic ports for oil inlet, oil outlet, and control oil (if any). Refer to the hydraulic schematic in the manual to determine the correct port assignments.
2. Connect the Hydraulic Hoses
Use the appropriate hydraulic hoses to connect the motor to the hydraulic power unit and the control valves. Make sure the hoses are the correct size and have the proper fittings. Tighten the hose connections using a wrench to prevent leaks.
3. Fill the Hydraulic System
Before starting the motor, fill the hydraulic system with the recommended hydraulic fluid. Check the fluid level and ensure there are no air bubbles in the system.
Testing and Commissioning
1. Initial Checks
After completing all the connections, perform a final visual inspection to ensure all wires, hoses, and connections are properly installed. Check for any loose connections or signs of damage.
2. Power On the Control System
Turn on the control system and check if all the indicators and displays are functioning correctly. Monitor the system for any error messages or abnormal readings.
3. Test Run the Motor
Start the motor at a low speed and observe its operation. Check for any unusual noises, vibrations, or leaks. Gradually increase the speed and load to the desired operating conditions and monitor the motor's performance.
4. Adjust the Control Parameters
If necessary, adjust the control parameters of the control system to optimize the motor's performance. This may include adjusting the speed, torque, or direction control settings.
Troubleshooting Common Issues
1. Motor Not Starting
- Check the power supply to ensure it is connected and providing the correct voltage.
- Inspect the electrical connections for loose or damaged wires.
- Check the hydraulic system for proper oil flow and pressure.
2. Abnormal Noise or Vibration
- Check the motor's mounting to ensure it is secure.
- Inspect the hydraulic hoses for any kinks or blockages.
- Check the motor's bearings and other mechanical components for wear or damage.
3. Leaks
- Tighten the hydraulic hose connections if they are loose.
- Replace any damaged seals or gaskets in the hydraulic system.
Conclusion
Connecting a Rexroth motor to a control system requires careful attention to detail and following the manufacturer's instructions. By following the steps outlined in this blog post, you can ensure a successful connection and reliable operation of the motor.
If you have any questions or need further assistance with connecting a Rexroth motor to a control system, or if you are interested in purchasing Rexroth motors for your application, please feel free to contact us for more information and to start a procurement negotiation.
References
- Rexroth Motor User Manuals
- Control System User Manuals